
在CentOS 7安裝Oracle Database 19c單機版
安裝Oracle
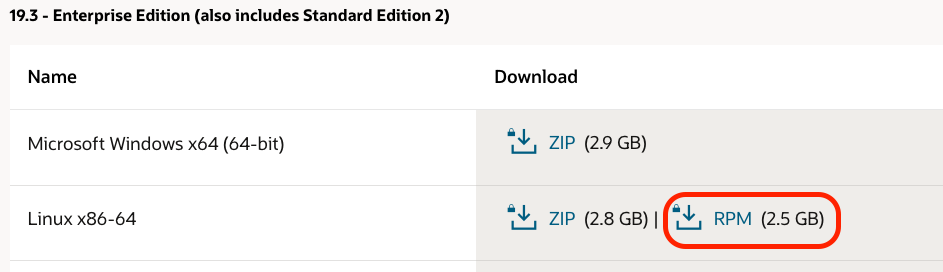
步驟1:至Oracle網站取得Oracle的帳號,並下載Oracle Database RPM安裝檔,如下圖洪匡處,RPM檔案可以利用SFTP或其他方式上傳到伺服器上。
步驟2:準備一台CentOS 7伺服器,至少2 CPU、4 GB 記憶體,硬碟空間按照自己需求即可,另外,記得要先執行更新($ yum update)!
步驟3:確認Hostname是否正確,並請確保DNS解析正常,若只是單機,建議在 /etc/hosts中設定Hostname。
步驟4:關閉SELinux。
$ sudo vi /etc/selinux/config步驟5:關閉防火牆。 (因為是單機,且用做實驗,若是生產環境,請按照當下環境的規範!)
$ sudo systemctl stop firewalld
$ sudo systemctl disable firewalld步驟6:設定Oracle的Yum源。
$ sudo curl http://public-yum.oracle.com/public-yum-ol7.repo -o /etc/yum.repos.d/public-yum-ol7.repo
$ sudo sed -i -e "s/enabled=1/enabled=0/g" /etc/yum.repos.d/public-yum-ol7.repo
$ rpm --import http://yum.oracle.com/RPM-GPG-KEY-oracle-ol7步驟7:安裝Oracle Database Preinstall工具,確保環境沒有缺漏。
$ sudo yum --enablerepo=ol7_latest -y install oracle-database-preinstall-19c步驟8:安裝Oracle Database。
$ sudo rpm -Uvh oracle-database-ee-19c-1.0-1.x86_64.rpm
Preparing...                          ################################# [100%]
Updating / installing...
   1:oracle-database-ee-19c-1.0-1     ################################# [100%]
[INFO] Executing post installation scripts...
[INFO] Oracle home installed successfully and ready to be configured.
To configure a sample Oracle Database you can execute the following service configuration script as root: /etc/init.d/oracledb_ORCLCDB-19c configure步驟9:編輯設定檔案,在此我們不做任何更動。
$ sudo vi /etc/sysconfig/oracledb_ORCLCDB-19c.conf
# change default settings if you need
# listening port for Listener
LISTENER_PORT=1521

# data location
ORACLE_DATA_LOCATION=/opt/oracle/oradata

# EM_EXPRESS_PORT: Oracle EM Express listener
# listening port for Enterprise Manager
EM_EXPRESS_PORT=5500步驟10:設定Oracle Database,此步驟需要一些時間來完成設定。
$ /etc/init.d/oracledb_ORCLCDB-19c configure
Configuring Oracle Database ORCLCDB.
Prepare for db operation
8% complete
Copying database files
31% complete
Creating and starting Oracle instance
32% complete
36% complete
40% complete
43% complete
46% complete
Completing Database Creation
51% complete
54% complete
Creating Pluggable Databases
58% complete
77% complete
Executing Post Configuration Actions
100% complete
Database creation complete. For details check the logfiles at:
 /opt/oracle/cfgtoollogs/dbca/ORCLCDB.
Database Information:
Global Database Name:ORCLCDB
System Identifier(SID):ORCLCDB
Look at the log file "/opt/oracle/cfgtoollogs/dbca/ORCLCDB/ORCLCDB.log" for further details.

Database configuration completed successfully. The passwords were auto generated, you must change them by connecting to the database using 'sqlplus / as sysdba' as the oracle user.步驟11:修改帳號oracle的密碼,因為此時的密碼是系統亂數產生的。
$ sudo passwd oracle
Changing password for user oracle.
New password:
Retype new password:
passwd: all authentication tokens updated successfully.步驟12:調整設定:
$ sudo vi /etc/oratab
ORCLCDB:/opt/oracle/product/19c/dbhome_1:Y
# 從N改為Y

# 新增設定檔案
$ sudo vi /etc/sysconfig/ORCLCDB.oracledb
ORACLE_BASE=/opt/oracle/oradata
ORACLE_HOME=/opt/oracle/product/19c/dbhome_1
ORACLE_SID=ORCLCDB步驟13:設定接聽器服務(Listener Service) Systemd。
$ sudo vi /usr/lib/systemd/system/OracleLsnrctl.service
[Unit]
Description=Oracle Net Listener
After=network.target

[Service]
Type=forking
EnvironmentFile=/etc/sysconfig/ORCLCDB.oracledb
ExecStart=/opt/oracle/product/19c/dbhome_1/bin/lsnrctl start
ExecStop=/opt/oracle/product/19c/dbhome_1/bin/lsnrctl stop
User=oracle

[Install]
WantedBy=multi-user.target步驟14:設定資料庫服務Systemd。
$ sudo vi /usr/lib/systemd/system/OracleDatabase.service
[Unit]
Description=Oracle Database service
After=network.target lsnrctl.service

[Service]
Type=forking
EnvironmentFile=/etc/sysconfig/ORCLCDB.oracledb
ExecStart=/opt/oracle/product/19c/dbhome_1/bin/dbstart $ORACLE_HOME
ExecStop=/opt/oracle/product/19c/dbhome_1/bin/dbshut $ORACLE_HOME
User=oracle

[Install]
WantedBy=multi-user.target步驟15:設定開機啟動Oraccle。
$ sudo systemctl enable --now OracleLsnrctl OracleDatabase步驟16:接下來改用oracle帳號操作,所以轉換身份。
$ su - oracle步驟17:設定bash_profille,加入以下設定值:
oracle$ vi ~/.bash_profile

umask 022
export ORACLE_SID=ORCLCDB
export ORACLE_BASE=/opt/oracle/oradata
export ORACLE_HOME=/opt/oracle/product/19c/dbhome_1
export PATH=$PATH:$ORACLE_HOME/bin

oracle$ source ~/.bash_profile步驟18:以sysdba身份登入。
oracle$ sqlplus / as sysdba

SQL*Plus: Release 19.0.0.0.0 - Production on Fri Oct 15 01:08:45 2021
Version 19.3.0.0.0

Copyright (c) 1982, 2019, Oracle.  All rights reserved.

Oracle Database 19c Enterprise Edition Release 19.0.0.0.0 - Production
Version 19.3.0.0.0
顯示以上資訊表示已經以sysdba身份登入Oracle成功了!
~ END ~