在CentOS 7安裝PostgreSQL 14.x – 單機環境
安裝PostgreSQL 14.x
官方網站:https://www.postgresql.org/
步驟1:下載PostgreSQL 14.x的RPM Repo檔並安裝。(RHEL 7 / CentOS 7 Only)
$ sudo yum install -y https://download.postgresql.org/pub/repos/yum/reporpms/EL-7-x86_64/pgdg-redhat-repo-latest.noarch.rpmRHEL 8 / CentOS 8 / Rocky Linux 8:
$ sudo yum install -y https://download.postgresql.org/pub/repos/yum/reporpms/EL-8-x86_64/pgdg-redhat-repo-latest.noarch.rpm步驟2:安裝PostgreSQL Server。
$ sudo yum install -y postgresql14-server步驟3:初始化PostgreSQL。
$ sudo /usr/pgsql-14/bin/postgresql-14-setup initdb步驟4:設定PostgreSQL接聽所有網路。
$ vi /var/lib/pgsql/14/data/postgresql.conf

# 尋找listen_addresses,並增加以下設定,*表示接聽本機所有網路IP
listen_addresses = '*'、步驟5:允許連入來源IP。
$ vi /var/lib/pgsql/14/data/pg_hba.conf

# 新增或調整為以下設定
# IPv4 local connections:
host    all             all             0.0.0.0/0            scram-sha-256
# IPv6 local connections:
host all all ::/00 scram-sha-256步驟6:啟動PostgreSQL。
$ sudo systemctl enable postgresql-14
$ sudo systemctl start postgresql-14
創建管理用(superuser)的帳號
步驟1:登入PostgreSQL。
$ sudo -u postgres psql步驟2:建立一個帳號,並設定為Superuser。
postgres=# sudo -u postgres createuser -s -i -d -r -l -w <<username>>步驟3:設定該帳號的密碼。
postgres=# sudo -u  \password <<username>>
Enter new password:
Enter it again:使用pgAdmin管理PostgreSQL
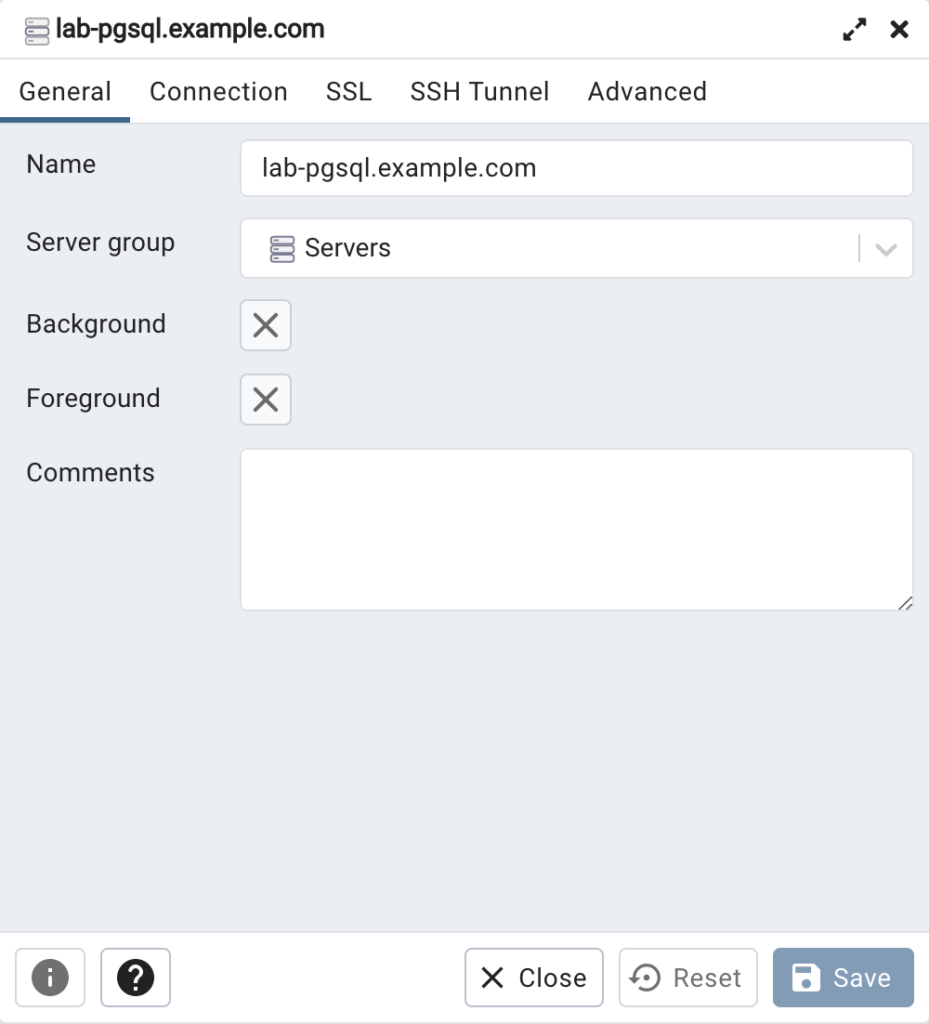
步驟1:右鍵點選Servers,選擇Create –> Server,會跳出連線設定視窗。

步驟2:General標籤頁,必須至少輸入Name,其餘為Optional。
步驟3:切換到Connection頁籤,輸入Host name、Port、Maintenance database、Username、Password。
** Maintenance database:若無預先建立資料庫,可以輸入預設的postgres資料庫。
步驟4:點選SSL頁籤,SSL mode可以選擇關閉,本篇並沒有設定加密連線,然後即可儲存(Save)。

步驟5:在左邊的Servers,可以看到剛剛設定的連線,右鍵選擇Connect後即可連到PostgreSQL資料庫。

~ END ~